


Introduction
Orca has established itself as a leader in the Solana DeFi space by combining advanced technology applications with a user-friendly experience.
It is worth noting that Orca have a tutorial for how to use their platform themselves which can be found here.
This guide will aim to simplify the usage process even further.
Before proceeding, ensure you understand Concentrated Liquidity. If not, our breakdown of Concentrated Liquidity Market Makers (CLMMs) is available in this article here.
Initial Interface
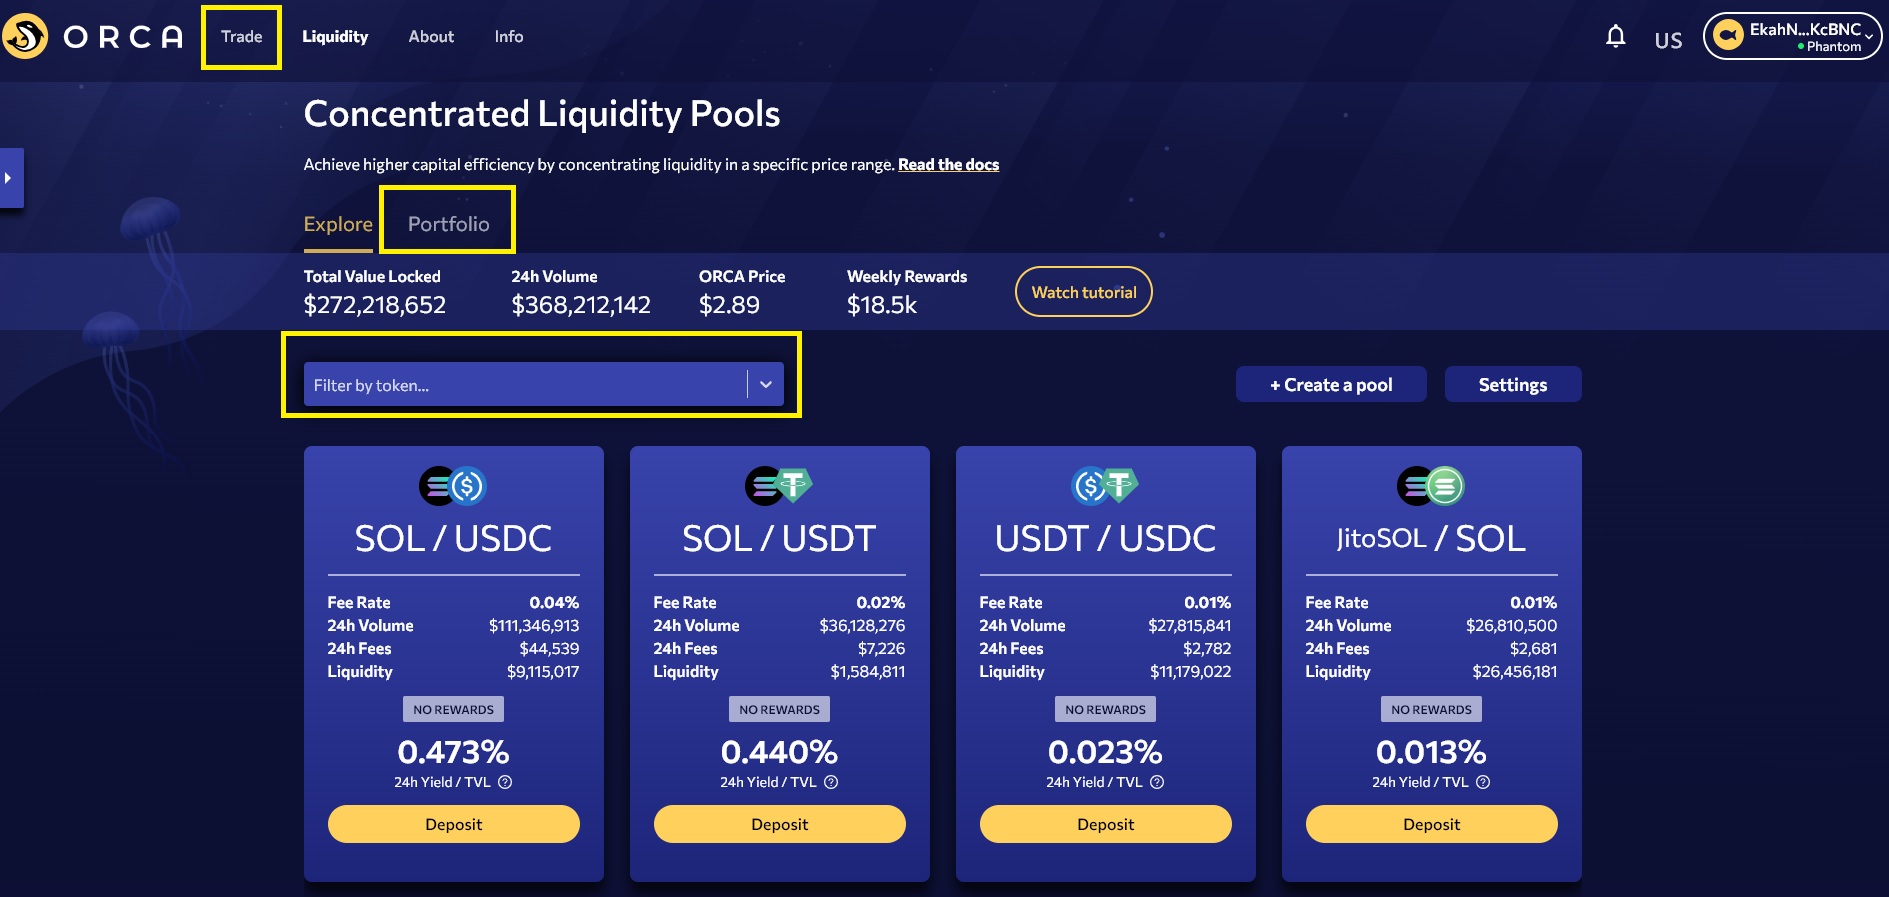
Navigate to the Liquidity page and you will encounter the interface depicted in the image above, with several key functions highlighted:
- Trade: Use this function to perform swaps using Orca pools. For the best swap deals, I personally recommend using Jupiter.
- Portfolio: View your positions, monitor their performance, and harvest your rewards.
- Filter: Display only the pools that involve your preferred token.
Selecting a Pool
For the purposes of this guide, we will focus on SOL/USDC pools. Applying the filter for these pools will display an interface like the one shown in the image below.
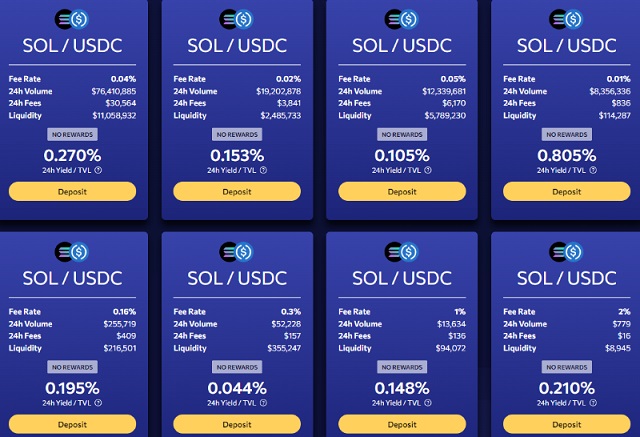
When you filter for SOL/USDC pools, you’ll notice that different users have established several pools for the same pairings. The key parameters of each pool include:
- Fee Rate: The percentage charged on swaps conducted through the pool.
- 24H Volume: The total trade volume through the pool over the past 24 hours.
- 24H Fees: The total fees earned by the pool in the past 24 hours, calculated as 24H Volume multiplied by the Fee Rate.
- Liquidity: The current total value locked (TVL) in the pool.
The data is used to calculate the average 24-hour Yield/TVL ratio. This simplifies the process of selecting a pool based on the highest percentage yield. Keep in mind that these percentages are dynamic and may change frequently.
Setting Your Range
Once you’ve selected a pool, click on ‘Deposit’. This action will display the interface shown in the image below:
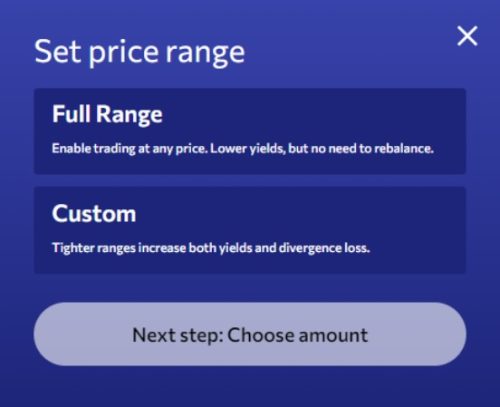
You will have the option to deposit in either a full range or a custom range. For the purposes of this guide, we will concentrate our liquidity using the custom range function, as it allows for more targeted placement of funds. Full range deposits are more straightforward and do not require specific configurations.
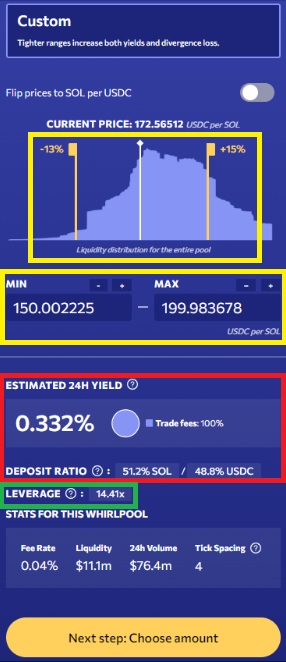
The window displayed in the image above is where you can set the parameters for your deposit. You have the option to define the upper and lower limits of your range either by using the sliding toggles or by entering exact numbers in the boxes provided below. Both methods are highlighted in the yellow boxes in the image.
It’s also interesting to note that the image displays how the current liquidity in the pool is distributed. Remember that this distribution can change as users rebalance their pools, and it may not always be consistent with other pools.
Once you’ve set your range, the window will calculate your estimated yield and the required deposit ratios, which are displayed in the red box.
It is important to note that the leverage figure highlighted in the green box does not represent leverage in the traditional trading sense. Instead, it indicates your capital efficiency relative to a full range Automated Market Maker (AMM). As we know, a higher number signifies greater capital efficiency; however, it also means you could be more exposed to potential impermanent/divergence loss. If you aren’t sure what this means, be sure to rehash our article covering CLMMs here.
Deposit Your Funds
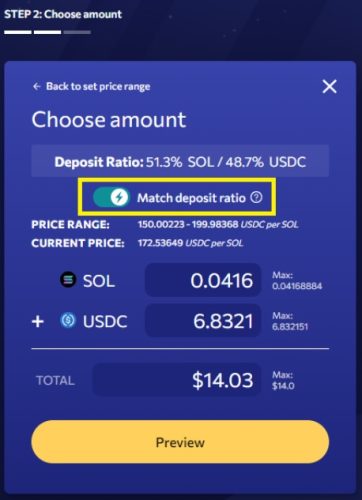
Finally, set your deposit amounts. A feature of Orca that I find particularly beneficial is the Match Deposit Ratio function. Traditionally, you would have to conduct swaps manually to achieve the correct deposit ratio, often leaving residual amounts of one of the tokens. This function automatically performs a swap during the deposit transaction to ensure the correct ratio, greatly simplifying the process.
Position Token

EXTREMELY IMPORTANT: Once you have deposited your funds, you will receive an NFT, as depicted in the image above. This NFT functions like a receipt for your deposit. Similar to receiving a ticket when you drop off your dry cleaning, which you must present to retrieve your items, you need this NFT to withdraw and manage your position. Under no circumstances should you burn this token. Despite the warning ‘Do Not Burn’ making some people suspect it’s a scam, it is indeed legitimate. Seriously, do not burn it.
Position Management
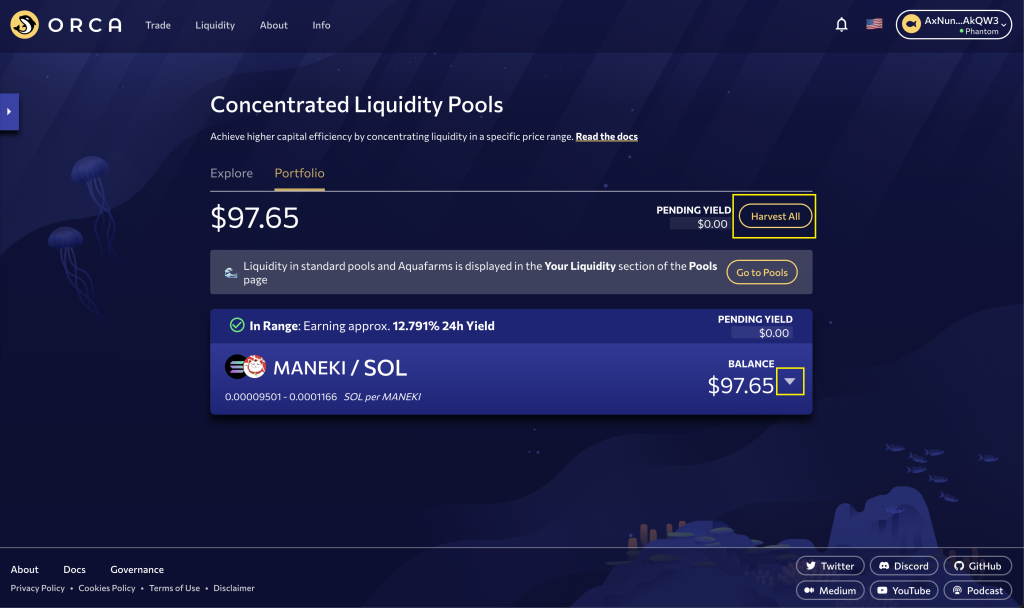
Navigate to the Portfolio page to access a dashboard displaying your open positions. Here are a couple of key points to note:
- Harvesting: You cannot harvest rewards from individual positions. Instead, use the ‘Harvest All’ button (highlighted with a yellow box) to collect rewards from all pools simultaneously.
- Compounding: Orca does not automatically compound your rewards. You must manually harvest your rewards and then redeposit them to compound your position.
To view details about individual positions, click on the down arrow highlighted with a yellow box. This will expand the section and provide more specific information.
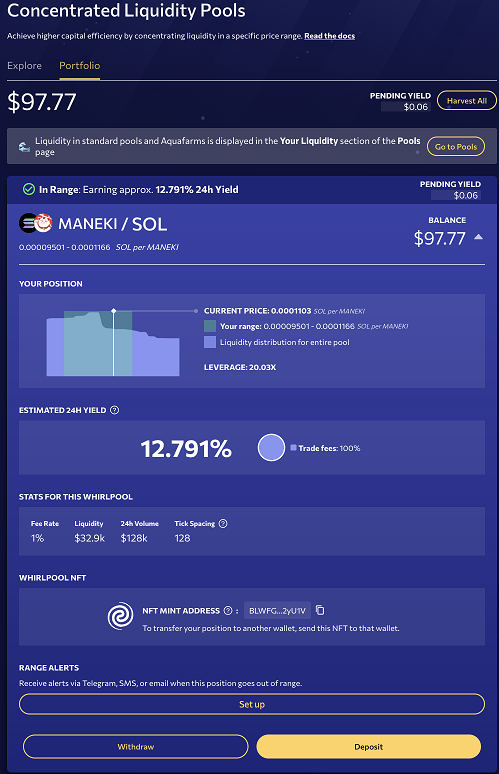
From here, you can see:
- Price Range: Check whether the price is still within your set range and view the average yield rate being generated.
- Alerts: You can set up alerts to notify you when the price moves outside your designated range.
- Management Options: There are options to either withdraw your position or deposit additional funds, allowing you to adjust your investments based on market conditions or your financial strategy
Summary
DeFi and concentrated liquidity provide users with the opportunity to leverage their holdings to earn yield. Employing the right strategy, coupled with Orca’s intuitive interface, can unlock significant potential for returns.